Friday, May 31, 2013

Baking Powder Pizza Dough

What???

Pizza dough that is not made with yeast???  Yep.  It all started because my kids asked for pizza tonight and I didn't realize that I had run out of yeast, so I did a quick search on google and found this great recipe from Joe Macho.

Now I've never made dough without yeast and I wasn't quite sure how it would turn out, but you gotta take risks sometimes right???

I will tell you that it turned out great, it was soooo crispy and thin just like I love it.  Even better is that I never have to worry about not having yeast around if I am in the mood for a homemade pizza :)


Baking Powder Pizza Dough


1 3/4 Cups Flour
1/4 Cup Olive Oil
2 Teaspoons Baking Powder
1 Teaspoon Salt
3/4 Cup Water


Sift flour, baking powder and salt into a large bowl, add the olive oil.  With a fork, stir in the oil until a crumbly mixture forms.  Pour in the water, slowly, while constantly mixing until a dough ball forms and no flour is left in the bowl.

Knead the dough on a well floured surface for 2-3 minutes.  Roll out the dough with a rolling pin as  close to the size of the pan you are going to use.

Grease the pan and transfer the dough onto it.  With a fork, poke all around the dough,  it will eliminate any bubbles that may occur when baking.

Finish off with your favorite sauce and toppings.  You can cover the pizza at this point and refrigerate until ready to use, or bake in a 500F for 12 to 13 minutes. 

Baking Powder Pizza Dough

Tuesday, May 28, 2013

Freezer Pickles

I am so sorry about the non updating of this blog lately, but I just haven't had time to do it.

After 22 years in the military, my husband is retiring and we are moving back home, and we are leaving this base in 4 weeks, which means a lot of paperwork, a lot of running around and a lot of packing and stressing.

I've been cooking but just haven't had time to get the recipes on the blog, so the updating will be sporadic for a while, bear with me.

Here is a great recipe for those who enjoy pickles, this one takes 3 days from start to finish but it's well worth it, so delicious.

You can use any kind of cucumber.  And guess what?  These pickles will stay good in the freezer for up to a year :)

Freezer Pickles
Freezer Pickles
Source:  The Amish Cook at Home

4 to 5 cucumbers, peeled and cut into 1/2 inch thick slices
2 tablespoons of salt
1 large onion, sliced
1 3/4 cups sugar
1/2 cup distilled white vinegar


Freezer Pickles

Day 1 - Put the cucumbers, salt and onion in a large bowl.  Cover and refrigerate for 24 hours.

Day 2 - Drain the sauce from the cucumbers.  Combine the sugar and vinegar and stir to dissolve the sugar.  Pour the mixture over the cucumbers.  Cover and refrigerate for 24 hours.

Day 3 - Take the pickles out of the refrigerator and pack into a freezer safe container.  Pour the syrup over the pickles and freeze until ready to use.


Tuesday, May 21, 2013

Family Burrito Bake

Family Burrito Bake

I recently hosted a Pampered Chef party, and one of the items I purchased was the Deep Dish Baker Cookbook.  It is filled with delicious, easy recipes, and I've marked a few to try.

This one however, caught my eye right away and was therefore the first on the list.

So good and filling too. Quick note, I didn't cook mine in the microwave, I adapted it to bake in the oven.


Family Burrito Bake
Family Burrito Bake
Adapted from Pampered Chef

1 med onion
1 lb of 90% lean ground beef
Cumin, thyme, basil, oregano and garlic powder (I just added in a sprinkle of each)

1 can Mexican-style corn, drained (11 oz)
1 jar (12oz or more) chunky salsa, divided
1 can (16oz) refried beans

(6 inch) corn tortillas
2 cups shredded Colby and Monterey Jack cheese blend, divided

In a skillet,  combine onion, beef, seasonings, and pressed garlic; mix well.   Drain.  Add in the can of corn and refried beans and stir to combine.

To assemble, place tortillas on bottom of baker or casserole dish, to cover.  Cut one tortilla to fill any gaps as layers are assembled. Spread 1/3 of the beef mixuture, top with some salsa and 1/3 of the cheese. Repeat layers two times ending with beef mixture, salsa and cheese.

Cover the baker, if using a casserole dish cover with foil.  Bake at 350 degrees for 50 to 55 minutes or until warmed through.  Remove from oven and let stand for 10 minutes before serving. 

Family Burrito Bake

Family Burrito Bake

Easy Chicken Casserole

Easy Chicken Casserole

Easy, quick weekday dinner.

When I want something simple that I know my family will rave about, I turn to my Amish cookbooks. Usually will find loads of casseroles and simple dishes.

This one got the thumbs up from hubby and both kids, they even asked for the leftovers for the following day's lunch.

Easy Chicken Casserole

Amish Easy Chicken Casserole

8 oz. noodles, cooked
2 c. cooked chicken, cubed
2 c. chicken broth (can used canned)
1 c. milk
1 can mushrooms
2 tsp. salt
1/2 tsp. pepper
1/2 c. margarine
1/3 c. flour
1/3 c. grated Parmesan cheese (I used shredded Colby Jack)

Melt margarine, then add flour and stir until smooth. Gradually add milk and broth, then seasonings and mushrooms. Combine chicken, cooked noodles, and prepared sauce. Put in ungreased 9 inch x 13 inch x 2 inch baking pan and top with Parmesan cheese.

Easy Chicken Casserole

Saturday, May 11, 2013

Homemade Dog Treats!

Weird huh?  I bet you were thinking I was posting the usual human yumminess, but I decided to do something a little different.

See I love my pugs and I think that they deserve good stuff to eat too.  Usually I would buy them dog treats, you know those baggie ones full of stuff that you can't pronounce and additives and other nasty stuff.  I did it because.....well because my dogs love treats and because it had never crossed my mind that I could make them myself at home.

So for the longest time they had the packaged ones.  Then in January my youngest pug had a seizure, and then two weeks ago, she had another.  And it's opened my eyes and it's made me realize that while I may not be able to control the seizures, I CAN and WILL ensure that my pets are getting healthy food in their system.

I set out to find homemade dog treats and boy was I surprised at the amount of recipes out there, everything from very simple to elaborate, from peanut butter to gourmet ground beef and sesame seeds.

Yep, I'm off on a new adventure, one that will consist of me baking a ton of treats every Sunday for their jar.

I honestly feel SO much better knowing that I'm going to give them homemade instead of store bought.

This afternoon I baked two different recipes which yielded quite a bit of treats and a very full jar.  They are so excited and happy, they immediately munched down and even begged for more.

2013_05110042
Crunchy Beefy Dog Treats
Crunchy Beefy Dog Treats are a recommended recipe from the Humane Society for homemade treats


½ cup cornmeal
2 cups whole wheat flour
6 tbsp oil
⅔ cup beef broth


Add the two dry ingredient to the mixer stand bowl and then combine on low for about 15 seconds.
Continue by adding the wet ingredients to the mixer stand bowl. Once these are added mix on medium for about a minute or until there is pretty much a dough ball sitting in your bowl.

Start preheating the oven to 350 degrees. Take the dough out and using a rolling pin spread it out until it is about ¼ inch thick. Use your cookie cutter to make the treats and set them on an ungreased cookie sheet. Repeat this with the remaining dough by making a new ball and spreading out a gain until it has all been used.

Bake treats for 40 minutes turning at 20. This makes the treats nice and crunchy like dogs like them. Let the treats cool and test. This recipe will make about 2 dozen treats (depending on your cookie cutter shape).

************************************

2013_05110040
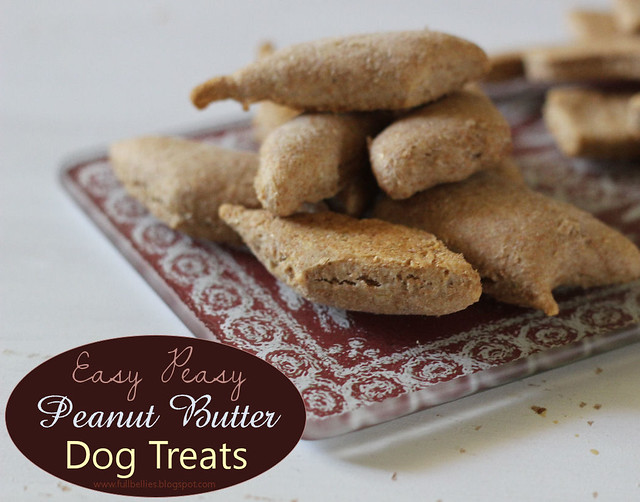
Easy Peasy Peanut Butter Dog Treats
(makes about 3 dozen)


2 cups whole wheat flour
1 1/2 teaspoons baking powder
1/3 cup smooth natural or organic peanut butter
1 cup hot water or 1 cup skim milk
1 egg (it’s awesome for a shiny coat)


1. Preheat the oven to 375°F.

2. Mix together the flour and baking powder in a big bowl.

3. In a separate bowl, mix together the peanut butter and hot water until smooth. Slowly add the dry mixture and mix well. Add a little more water or milk if the dough is too dry, or flour if it’s too wet.

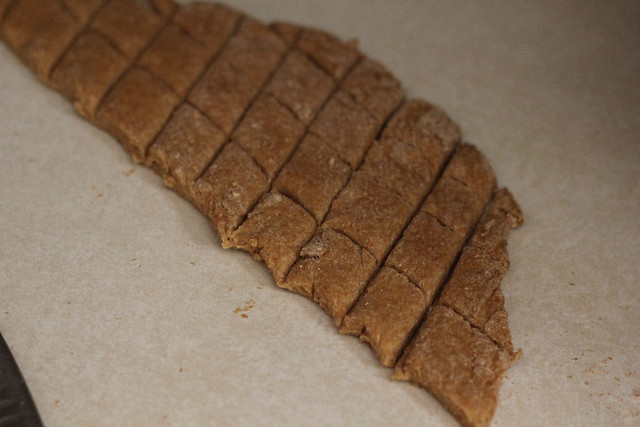
4. Place onto your counter and roll to 1/4″ thickness.

5. Cut with a cookie cutter and place on a cookie sheet. (I can not for the life of my find my dog bone cookie cutters, so I went with just simple shapes)

2013_05110023

6. Bake for 20 minutes or until lightly brown. Let cool, and then let the begging begin!

Wednesday, May 01, 2013

Pin and Win with Lucky Leaf!


Guess what?!?!?!  It's time for another great Lucky Leaf contest, and this time through Pinterest.

Good things come to those who PIN!  And I know a lot of you out there are master pinners right?

2013_04220004

The wonderful folks at Lucky Leaf always send me the best goodies, and as a woman who loves to cook and bake, there is nothing better than answering the door and being handed a box filled with goodies.

This time, the cutest Retro Kitchen Timer, and it's red so it matches my kitchen.....love it.

2013_04220006

Along with the great pie fillings, also 3 really yummy looking recipes, and I asked the kids to pick which one they wanted to try first, and of course they went for the Cherry Coconut Squares. They DO look good even if I'm not a big fan of Cherry anything.

Cherry Coconut Squares


⅓ cup sugar
¼ cup butter
1 ½ cups all-purpose flour, sifted
¼ teaspoon salt
18-ounce can flaked coconut
121-ounce can LUCKY LEAF® Regular or Premium Cherry Pie Filling


Preheat oven to 375°F.
Cream sugar and butter. Sift flour and salt together and then add to creamed mixture. Mix in coconut.
Pack 1/2 of this mixture into a greased 9-inch square pan.

Cherry Coconut Squares

Spread LUCKY LEAF Cherry Pie Filling on top. Put remaining crumb mixture on top of pie filling. Pat down firmly
Bake for 25 to 30 minutes. When cool, cut into 16-squares.

Cherry Coconut Squares

These were so good, and you wouldn't think so considering the simple ingredients it uses but I love the coconut addition, it totally kicks it up.

Over the next few days, after grocery shopping, I will be making the French Toast Apple Cobbler, and the Lemony Blueberry Layered Pie.  Oh my, now THAT one I really can't wait to sink my teeth into.

****************************************

Now....for the best part.   How would you like to win $500 or even $200???


Nothing to it.  So if you love pinning, now is your chance to enter and perhaps walk away with $500.

Good Luck everyone :)

Thank you to Lucky Leaf for providing me with samples for this review.  All opinions are my own.