Friday, March 29, 2013

Hot Cross Buns

Hot Cross Buns

One of the things I most remember from my childhood were the Easter Sunday's and the Hot Cross Buns.

I would look forward to these delicious spicy buns, all year long, and then the day would come and I would go to the store with my Stepmom to buy them. I couldn't wait to get home and rip into that package, pull apart one of the buns and sink my teeth in.

And one of my favorite things????

Hot Cross Buns

The next morning, I would slice one in half, pop it in the toaster, and then enjoy it with a generous slathering of butter. YUM!

When I got married, I started making my own Hot Cross buns, and along the years I've tried many recipes, some have been good, some have been not so good....I'm very picky about my Hot Cross Buns and I'll tell you right now that I can't STAND seeing icing on a Hot Cross Bun. It drives me crazy! LOL

Hot Cross Buns

This recipe comes from one of my food heroes, Paul Hollywood. Adore this man and he has taught me how to bake bread without being overwhelmed or intimidated, and the results have been amazing bread loaves and a renewed love for bread.

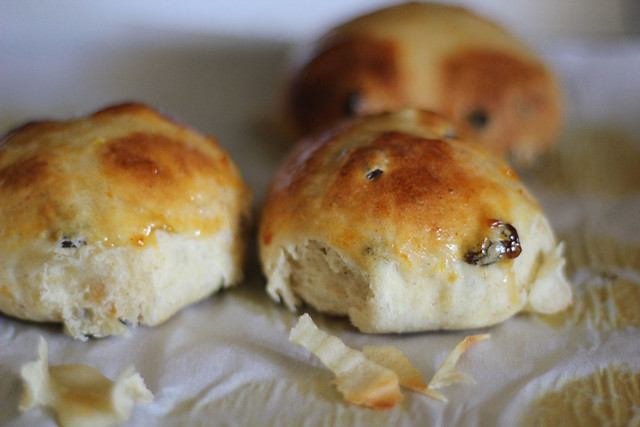
These are BY FAR the best Hot Cross Buns I've had in a very long time. It will now become my only Hot Cross bun recipe every Easter.

Hot Cross Buns


Hot Cross Buns


FOR THE BUNS

300ml full-fat milk , plus 2 tbsp more (1 cup)
50g butter (4 tablespoons)
500g strong bread flour (3 cups)
1 tsp salt
75g caster sugar (half cup white sugar)
1 tbsp sunflower oil
7g sachet fast-action or easy-blend yeast
1 egg , beaten
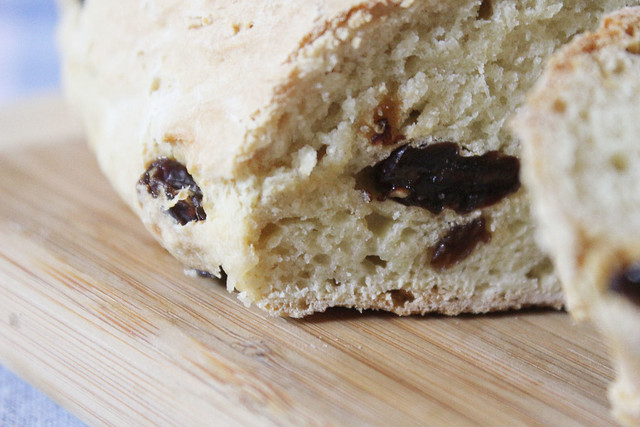
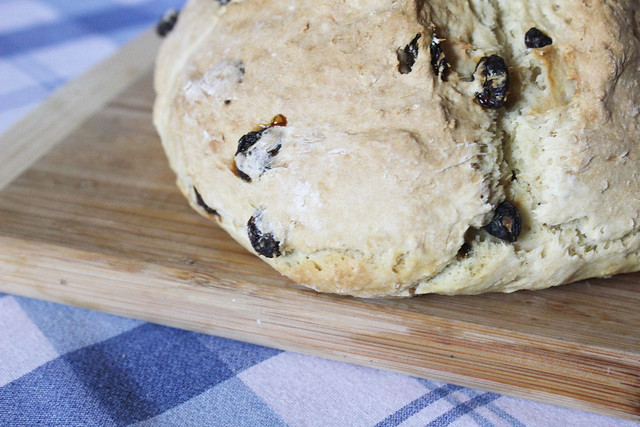
75g sultanas (I used about 1/2 cup of raisins)
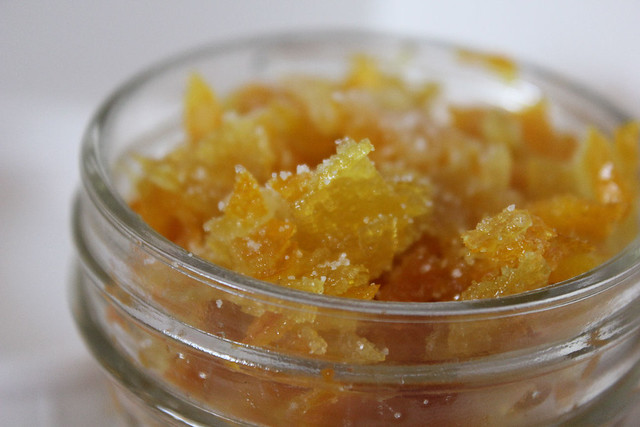
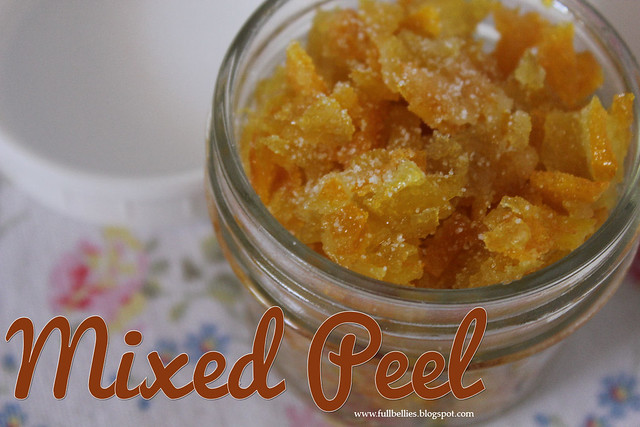
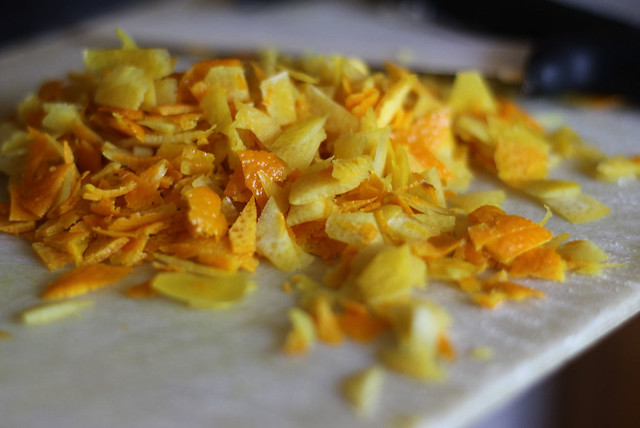
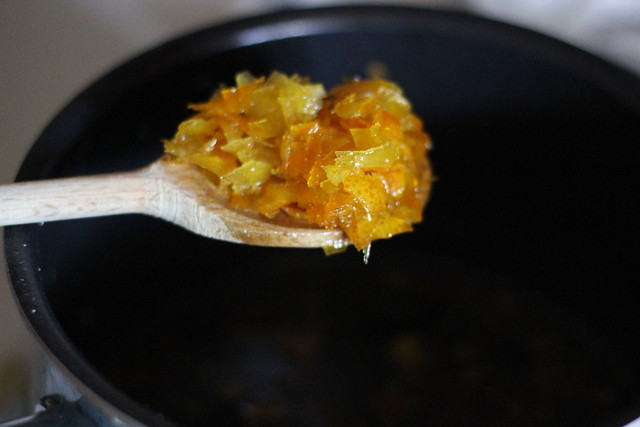
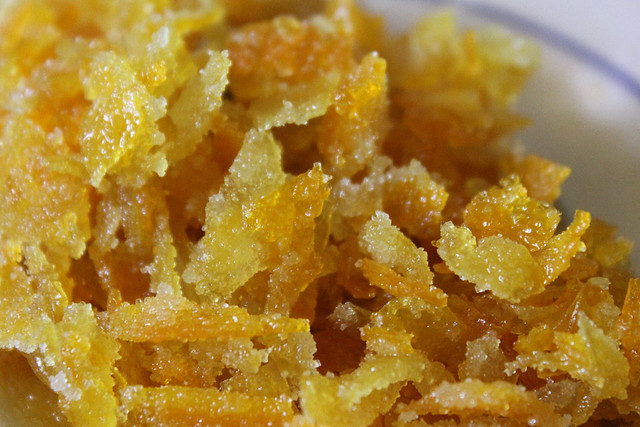
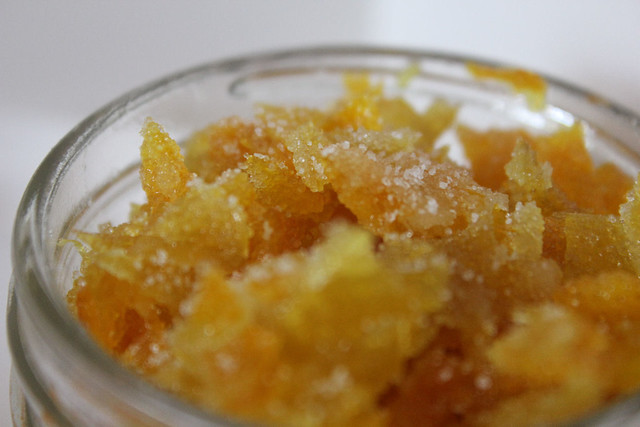
50g mixed peel  (about 1/2 cup)
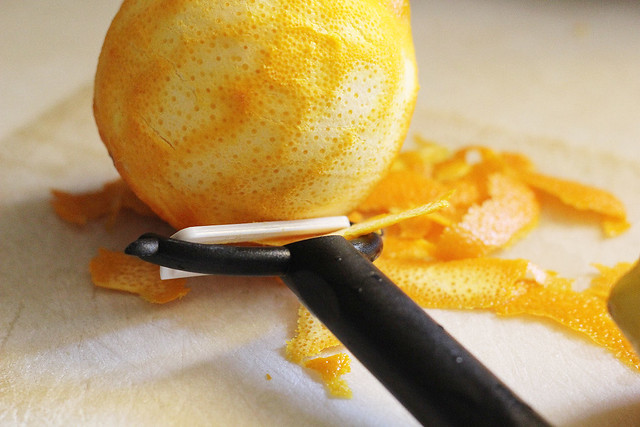
zest 1 orange
1 apple , peeled, cored and finely chopped
1 tsp ground cinnamon

FOR THE CROSS

75g plain flour , plus extra for dusting (1/2 cup)
about 5 Tablespoons

FOR THE GLAZE

3 tbsp apricot jam


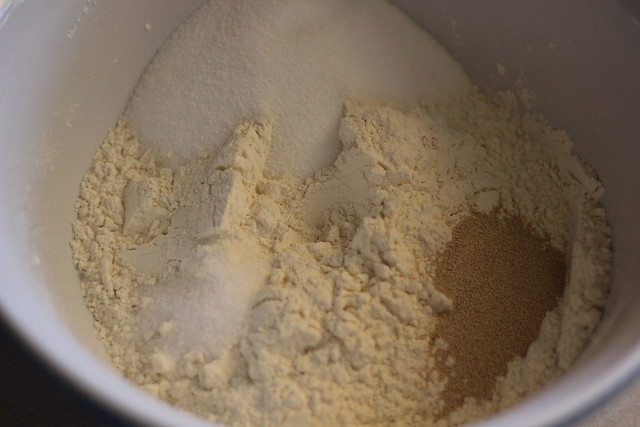
Tip from Paul:  When adding the salt and yeast to the flour, add each on opposite sides so they don't interfere with each other, as the salt will slow down the yeast.


Bring the milk to the boil, then remove from the heat and add the butter. Leave to cool until it reaches hand temperature. Put the flour, salt, sugar and yeast into a bowl. (see tip above)

Hot Cross Buns

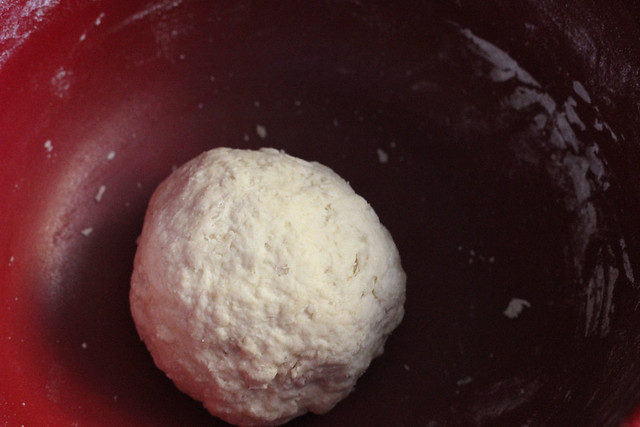
Make a well in the centre. Pour in the warm milk and butter mixture, then add the egg. Using a wooden spoon, mix well, then bring everything together with your hands until you have a sticky dough.

Tip on to a lightly floured surface and knead by holding the dough with one hand and stretching it with the heel of the other hand, then folding it back on itself. Repeat for 5 mins until smooth and elastic. Put the dough in a lightly oiled bowl. Cover with oiled cling film and leave to rise in a warm place for 1 hr or until doubled in size and a finger pressed into it leaves a dent.

Hot Cross Buns

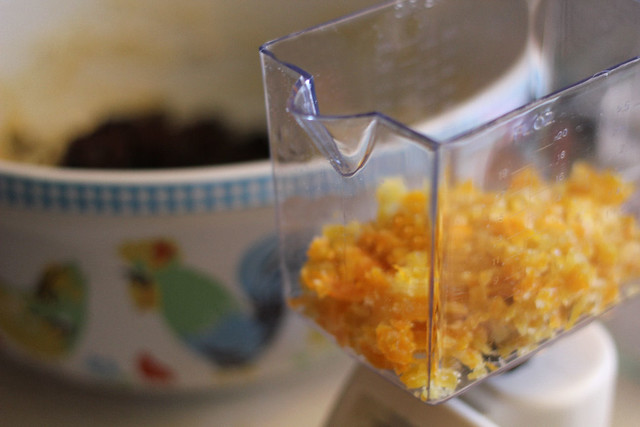
With the dough still in the bowl, tip in the sultanas, mixed peel, orange zest, apple and cinnamon. Knead into the dough, making sure everything is well distributed. Leave to rise for 1 hr more, or until doubled in size, again covered by some well-oiled cling film to stop the dough getting a crust.

Hot Cross Buns

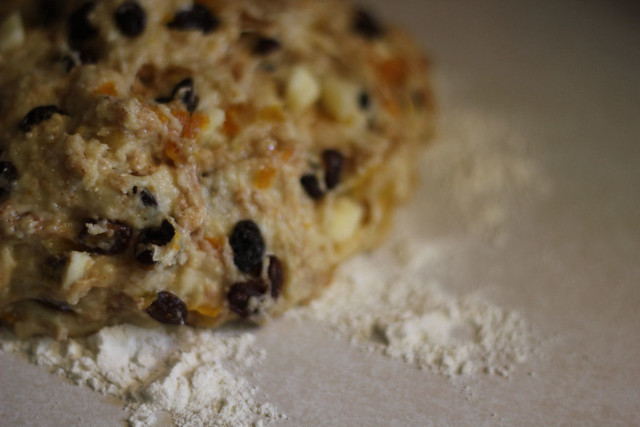
Divide the dough into 15 even pieces (about 75g per piece - see Tip below). Roll each piece into a smooth ball on a lightly floured work surface. Arrange the buns on one or two baking trays lined with parchment, leaving enough space for the dough to expand. Cover (but don't wrap) with more oiled cling film, or a clean tea towel, then set aside to prove for 1 hr more.

Hot Cross Buns

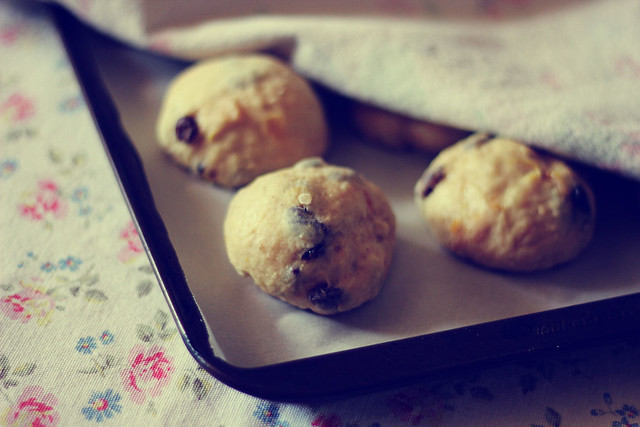
Heat oven to 220C/200C fan/gas 7. Mix the flour with about 5 tbsp water to make the paste for the cross - add the water 1 tbsp at a time, so you add just enough for a thick paste. Spoon into a piping bag with a small nozzle. Pipe a line along each row of buns, then repeat in the other direction to create crosses.

Hot Cross Buns

Bake for 20 mins on the middle shelf of the oven, until golden brown.

Gently heat the apricot jam to melt, then sieve to get rid of any chunks. While the jam is still warm, brush over the top of the warm buns and leave to cool.

Hot Cross Buns

Thursday, March 28, 2013

Teeny's Mexican Casserole

Teeny's Mexican Casserole

Another wonderful recipe from the Gooseberry Patch Fast Fix Meals.

I love that the recipes in these cookbooks are all easy, delicious, filling meals.  I don't think I've found one recipe that I haven't enjoyed.

Teeny's Mexican Casserole

Now, for this one I made tonight. It comes together really quick, it uses ingredients that we all like and the result is a creamy yummy dish. I think you'll enjoy this meal. :)

Teeny's Mexican Casserole
Ellen Mattingly, Flagstaff, AZ

1 to 1 and half lbs ground beef (I used Turkey)
1/2 cup. onion, chopped
4 oz can chopped green chiles
3/4 t. salt-free herb seasoning
3/4 t. garlic powderr
3/4 t. ground cumin
3/4 t. paprika
salt and pepper to taste
12  6-inch corn tortillas, torn into bite size pieces (I used flour tortillas, didn't have corn)
10  3/4 oz can cream of celery or mushroom (I used mushroom)
1/4 c. milk
12  oz pkg. shredded sharp or mild Cheddar cheese, divided


Cook ground beef and onion in a skillet until beef is browned and onion is tender.  Drain;  stir in chiles and seasonings.  Place tortilla pieces in a large bowl;  add soup, milk and 2 cups cheese.

Spoon warm meat mixture over tortillas.  Mix all very well and place in a greased 11 x 7 inch baking pan;  top with remaining cheese.  Bake, uncovered, at 350 degrees for 20 to 25 minutes, until bubbly and golden on top.

Serves 4 to 6.

Teeny's Mexican Casserole

Wednesday, March 27, 2013

Homemade Mixed Peel

Mixed Peel

Or candied peel as it is more commonly known in the USA.

It's one of those pantry items that I only really make for the holidays or for specific recipes.  I don't buy it at the store because I find it's usually quite expensive, and I've always preferred homemade, it tastes so much better.

It's easy to make, and you can change it up according to your recipe needs.  Usually, I have a mix of orange and lemon, sometimes orange, lemon, lime and grapefruit.

For this batch I went with orange, lemon and grapefruit, and the mixed peel will be used for my Hot Cross Buns on Sunday.


Mixed Peel

Mixed Peel

Peel from a whole orange
Peel from a whole lemon
Peel from a grapefruit (I don't use the huge grapefruits, just one of the smaller ones, or half of a really big one)


I try to get just the peel and none of the white pith as it makes it too bitter for my liking.

Mixed Peel

Take all the peels together, and chop them up into tiny little chunks.  Some people like to leave the peel whole, that is fine too, but I prefer it finely chopped.

Mixed Peel

Take the chopped peels and add them to a saucepan.  Add water just to cover the peels, turn on the heat and bring to a boil, then simmer for about 10 minutes.   Drain that water out, add fresh water to cover the peels and repeat the process.

Do that step 2 or 3 times.  The last time, don't drain the water, but add in 1/2 cup of sugar, stir well and let it simmer for a while until the peels turn translucent.  Depending on how much and the size of the peels you have in the pot, it may take anything from a few minutes to an hour to really get them translucent.

Mixed Peel

Remove the peels onto a plate.   Let them cool down a little, then sprinkle some sugar on to coat.

Mixed Peel

Store in a mason jar in the refrigerator.  Mine usually last about two weeks, but I don't make a very big batch, usually just enough for the recipes that I'm using that day or week.

Mixed Peel

Cheesy Corn and Bean Burritos

I have a family that loves meat.  Usually any recipe I prepare has some sort of meat in there, but sometimes I get quite tired of it and want something simple, with just some sort of vegetable and no meat in sight.

Cheesy Corn and Bean Burritos

As I was preparing my menu plan two weeks ago, I was looking through my Gooseberry Patch cookbook and saw these burritos.  That's it, just what I was wanting and since my family loves burritos, I knew this was a must try.

They are SO good, oh my goodness, delicious and no meat in sight.  I adapted them slightly from the original recipe.

Cheesy Corn and Bean Burritos
Adapted from Gooseberry Patch


15 oz can black beans, drained and rinsed
16 oz can corn, drained
8 oz can chopped grean chiles, drained
12 oz package shredded monterey jack cheese, divided
2 cups cooked rice (I added in a packet of the Sazon Goya seasoning)
6 to 8 10in flour tortillas
Salsa (I used homemade)


Combine beans, corn, chiles, 2 cups cheese; stir in cooked rice. Spoon 1/2 cup bean mixture along the center of each tortilla; top with 2 tablespoons salsa.

Cheesy Corn and Bean Burritos

Roll up burrito-style and place seam side down on a plate.

Heat up a non stick skillet, and grill the burritos on each side for a minute or so until nicely brown.  You will have a nice crispy outside and a soft inside when you bite into it.

Enjoy!!!

Monday, March 25, 2013

Stuffed Cubed Steak

Steak, Stuffing.  Enough said.

Two of my boy's favorite things on earth, especially my little one, he goes nuts for stuffing.  I do believe if it were up to him, he would eat stuffing every day of his life.

This is such a simple dinner but filling and comforting.  Perfect for a midweek meal and it made my son and hubby very happy.


Stuffed Cubed Steaks
Stuffed Cubed Steak
Source: Gooseberry Patch

6-oz. pkg. stuffing mix
0.87-oz. pkg. brown gravy mix
4 beef cube steaks
2 to 3 tsp. oil

Prepare stuffing mix according to package directions, adding a little extra liquid to make it extra moist. Place a heaping spoonful of stuffing on each steak;

Stuffed Cubed Steaks

roll up and secure with wooden toothpicks. Place oil in a large cast-iron skillet over medium-high heat; add stuffed steaks and brown on all sides. Meanwhile, prepare gravy mix according to package directions. When steaks are browned on all sides, add gravy to skillet. Reduce heat; cover and simmer for about 10 minutes, until steaks are tender. Serves 4.

Stuffed Cubed Steaks

Sunday, March 24, 2013

Roasted Peanuts Gooey Bars

Peanuts, one of my weaknesses.  Actually any kind of nuts, but mostly pecans and peanuts, I could eat them every single day and never tire.

Last year or the year before I made Pecan Pie Bars for Thanksgiving, and I was craving something like that this afternoon but had no pecans, the only thing I had was a jar of Roasted Peanuts, and that became the inspiration for these gooey bars.

The recipe was adapted from the Pecan Pie Bars over at Just a Taste.


Roasted Peanuts Gooey Bars

For crust:
2 sticks unsalted butter, softened
2/3 cup packed brown sugar
2 2/3 cups all-purpose flour
½ teaspoon salt

For topping:
1 stick (½ cup) unsalted butter
1 cup packed light brown sugar
1/3 cup maple syrup
2 tablespoons milk
2 cups roasted peanuts


Preheat the oven to 350ºF and line a 9x13-inch pan with parchment paper, leaving enough for a 2-inch overhang on all sides.

First make the crust by creaming together the butter and brown sugar until fluffy in a stand mixer fitted with the paddle attachment. Add in the flour and salt and mix until crumbly.

Press the crust into the lined pan and bake for 20 minutes until golden brown. (I baked mine for 15 minutes so they would weren't as dry but more gooey)

While the crust bakes, prepare the filling by combining the butter, brown sugar, maple syrup and milk in a saucepan and stirring it over medium heat. Simmer the mixture for 1 minute, then stir in the roasted peanuts.

Remove the crust from the oven and immediately pour the filling over the hot crust spreading it to cover the entire surface.

Return the pan to the oven and bake an additional 20 minutes.

Remove the pan and allow the bars to fully cool in the pan.

Use the foil overhang to lift out the bars and transfer them to a cutting board. Peel off the foil, slice into bars and serve.

Friday, March 22, 2013

Speedy Goulash

Another great, quick, weekday meal, from one of my Gooseberry Patch cookbooks.

Super simple to put together, and if your family likes pasta, they will surely enjoy this one.

Speedy Goulash
Speedy Goulash
Credit: Gooseberry Patch

1 lb. ground beef
1 onion
2 cloves garlic
1 T. Hungarian paprika
1/2 T. ground coriander
1/2 T. ground cumin
1/4 t. nutmeg
14-1/2 oz. can diced tomatoes
3 T. sour cream
salt and pepper to taste
8-oz. pkg. elbow macaroni, cooked

Brown ground beef in a large skillet over medium heat. While beef is cooking, grate onion and garlic directly into beef; add spices and mix well. When beef is just cooked, drain. Add tomatoes with juice; warm through.

Speedy Goulash

Stir in sour cream, salt, pepper and cooked macaroni; serve immediately. Serves 6.

Speedy Goulash

Sunday, March 17, 2013

Irish Soda Bread

So many variations on this bread, some with raisins, some without.

Irish Soda Bread is a staple at my house, on St. Patrick's Day, though I've been known to fix it throughout the year just because we enjoy it.

Irish Soda Bread

Again, the recipes are varied, you can find numerous online, in cookbooks and even handed down from generation to generation.

The one I use is for a very basic Irish Soda Bread and it was given to me by a friend many years ago, she jotted down the ingredients and a very basic how to on the back of an envelope, and to this day I have it in my drawer with the rest of my recipes.

She never told me what size pan to use, and the first time I made it I used a baking sheet but the bread flattened out a bit too much for my liking....since then I have made it in my 8 inch round cake pan and it works just fine.

Irish Soda Bread
Irish Soda Bread

3 cups flour
1/2 tsp baking soda
1/2 tsp baking powder
1 tsp salt
1 and 1/3 cups buttermilk
Raisins - optional

Sift all the dry ingredients into a bowl.  Add in the buttermilk and the raisins and stir together until well combined.

Irish Soda Bread

Dump the mixture onto a floured board and knead for a few seconds until smooth.  (Do not overknead).  Shape into a ball.

Irish Soda Bread

Line the bottom of an 8 inch pan with parchment paper.  Place the ball of dough in the middle of the pan, using a serrated knife make an X on the top, about 1/4 inch deep.

Irish Soda Bread

Bake at 350 degrees for 50 minutes.

Irish Soda Bread

Saturday, March 16, 2013

Homemade Quick Garlic Naan

When I make curries or like tonight, for the Chicken Tikka Masala, I always pair it with some Naan bread.  Usually I'll buy it premade but last year I came across a recipe for some quick homemade Naan and since then I have not bought from the store.

The recipe doesn't make many at all, matter of fact first time I made it, I ended up with just 4 small Naan's and we do love our Naan so the next time I tried it, I tripled the recipe.

The recipe comes from The Fresh Loaf, and she says that for each cup of flour you get 3 or 4 naan, depending on the size of your tawa or skillet.


Chicken Tikka Masala

Homemade Quick Garlic Naan


1 cup of all-purpose flour
1 tbsp sugar
generous pinch of baking soda
3 tbsp yogurt
little water if needed
Garlic (optional, if you don't want garlic naan just omit it)


In a large bowl, mix dry ingredients together. Add 3tbsp yogurt and a little water if needed.

Knead in the bowl until smooth and cover for 30 minutes.

2013_03160018

Preheat the tawa or a heavy skillet on medium high heat. Divide your dough and roll in to balls. For a 12" tawa, you will get 3 pieces of naan per cup of flour.

Roll on a lightly floured surface to approximately 1/4" thick. Dust off any excess flour and place on the hot tawa or skillet.

Optional- brush the top side with ghee (clarified butter) or oil. This recipe works perfectly well without the added fat but butter is tasty and it'll give you a crisper naan.

When bubbles begin to form (10 to 20 seconds), flip and use a clean, folded dish towel to constantly rotate the naan so it doesn't burn. It may puff up like a pita.

Optional- brush the 2nd side with ghee or oil

Flip once more after a minute or less once you have browning on one side and repeat the rotating until done.

Best enjoyed shortly after making. Dough balls will keep in the fridge for a couple of days.

Chicken Tikka Masala

Chicken Tikka Masala

I have always loved Indian food, but aside from Curry, I don't usually make any of the other dishes, mainly because I am always worried that I'll mess them up.

Chicken Tikka Masala

Chicken Tikka Masala is one of my favorite Indian dishes, it's been many years since I've had it but I was having such a craving that I decided it was now or never.

You can find many recipe variations in cookbooks and online, I even saw in the grocery store in the spice aisle, one of those McCormick pouch things with all the spices and a recipe.  I'll have to try that one next and see what I think.

Chicken Tikka Masala
Source:  Eating Well


4 teaspoons garam masala (see Note)
1/2 teaspoon salt
1/4 teaspoon turmeric
1/2 cup all-purpose flour
1 pound chicken tenders
4 teaspoons canola oil, divided
6 cloves garlic, minced
1 large sweet onion, diced
4 teaspoons minced fresh ginger
1 28-ounce can plum tomatoes, undrained (I used diced)
1/3 cup whipping cream
1/2 cup chopped fresh cilantro for garn


Stir together garam masala, salt and turmeric in a small dish. Place flour in a shallow dish. Sprinkle chicken with 1/2 teaspoon of the spice mixture and dredge in the flour. (Reserve the remaining spice mix and 1 tablespoon of the remaining flour.)

Heat 2 teaspoons oil in a large skillet over medium-high heat. Cook the chicken until browned, 1 to 2 minutes per side. Transfer to a plate.

Heat the remaining 2 teaspoons oil in the pan over medium-low heat. Add garlic, onion and ginger and cook, stirring often, until starting to brown, 5 to 7 minutes. Add the reserved spice mix and cook, stirring, until fragrant, 30 seconds to 1 minute. Sprinkle with the reserved 1 tablespoon flour and stir until coated. Add tomatoes and their juice.

Chicken Tikka Masala

Bring to a simmer, stirring and breaking up the tomatoes with a wooden spoon. Cook, stirring often, until thickened and the onion is tender, 3 to 5 minutes.

Stir in cream. Add the chicken and any accumulated juices to the pan. Bring to a simmer and cook over medium-low heat until the chicken is cooked through, 3 to 4 minutes. Garnish with cilantro.

Chicken Tikka Masala

Note: Garam masala, a blend of spices used in Indian cooking, usually includes cardamom, black pepper, cloves, nutmeg, fennel, cumin and coriander. It is available in the spice section of most supermarkets.

Chicken Tikka Masala

Fat Flush Water

As many of you already know, the past month I've been on a journey to eating healthier, exercising and getting more water into my system.

I had already cut out diet soda last year and was drinking only water, but the older I get the harder it is to lose weight, it just seems that your body comes to a screeching halt and nothing you do gets that weight off.

I've been looking and researching and last week I found the Fat Flush Water.

This water was first featured on The Biggest Loser and it's also been featured on the Dr. Oz show by nutritional coach Kym Lyon as part of her 10-day Ultimate Plan to to Trim Fat for Good.

I love fruit flavored water, so this water recipe was something I really looked forward to.  I just started today and I am enjoying the flavor, the longer it sits, the better it tastes.

According to Kim Lyons......

Fat Flush Water is simple to make and tastes great. Besides its main ingredient of water, the Fat Flush contains grapefruit that’s loaded with vitamin C to help your body turn fat into fuel. The tangerine increases your sensitivity to insulin, stabilizes blood sugar, and stimulates genes to burn fat. Cucumber helps you feel full and acts as a natural diuretic, which means less bloating and water retention. And lastly, it has peppermint, which is not only refreshing but also promotes better digestion and stomach calm. Make a big pitcher of Fat Flush Water every morning. The longer it sits, the better it will taste.

Fat Flush Water
Fat Flush Water

Ingredients per pitcher

Water
1 slice grapefruit
1 tangerine
½ cucumber, sliced
2 peppermint leaves
Ice


Directions: Combine ingredients in a large pitcher. Drink at least one 8 ounce glass three times a day before each meal for 10 days straight.


So, one glass before breakfast, one before lunch and one before dinner.  But since I only drink water anyway, I'm drinking this water  not only before meals but during the day.  It really is refreshing :)

Oh and according to Kim Lyons you can make iced tea this way too, just add a bag or two of tea to the water and you'll end up with a Tropical Tea.

I'll have to try that tomorrow, I think it will taste magnificent :)

EDIT:  Here is a video from Kim Lyon's explaining how to make the water.

Saturday, March 09, 2013

Creamy Chicken Manicotti

Creamy Chicken Manicotti

Here's a great midweek meal, it doesn't too long to put together and is sure to please little ones and big ones alike.

Creamy Chicken Manicotti

One of the reasons I really enjoy manicotti, is because the filling can be anything you like, you can use meat, you can use chicken, you can use seafood....go with a red sauce or a bechamel sauce or just cheese or whatever your heart desires. It's pretty cheap to make as well, so I usually have a box of manicotti in the pantry, at all times.

I adapted the recipe from Recipe.com. My family scarfed this one down, there were none left in the dish, I say that's a huge thumbs up right?

Creamy Chicken Manicotti


8 dried manicotti shells
1/4 cup finely chopped onion
1/4 cup butter
3 tablespoons all-purpose flour
1/4 teaspoon salt
2 cups whole milk
1 6-ounce package Tyson® Grilled & Ready® Refrigerated Chicken Breast Strips, finely chopped
1 egg yolk
1/2 teaspoon ground nutmeg
1-1/4 cups grated Parmesan cheese
1 15-ounce container ricotta cheese
ground nutmeg
fresh parsley


Preheat oven to 400 degrees F. Cook pasta according to package directions. Drain and rinse with cold water; drain and set aside.

For sauce, in a medium saucepan cook onion in hot butter over medium heat 4 minutes or until tender but not brown. Stir in flour and salt. Add milk all at once. Cook and stir until thickened and bubbly. Sprinkle in some ground nutmeg. Stir well, remove from heat; set aside.

For filling, in a medium bowl combine Grilled & Ready® Chicken Breast Strips,egg yolk, the 1/2 teaspoon nutmeg, 1 cup of the Parmesan cheese, parsley, and the ricotta cheese. Pour about 1/2 cup of the sauce into a buttered 2-quart rectangular baking dish; spread in a thin layer over bottom of dish.

Use a pastry tube fitted with the largest tip to pipe the filling into cooked manicotti. (Or carefully spoon about 1/3 cup of filling into each shell.) Arrange filled manicotti in baking dish in a single layer. Pour remaining sauce over manicotti. Sprinkle remaining 1/4 cup Parmesan cheese over the sauce.

Bake, uncovered, 20 minutes or until manicotti are light golden and heated through. Let stand 5-10 minutes before serving. If desired, garnish with a sprinkling of ground nutmeg and parsley.

Creamy Chicken Manicotti

Creamy Chicken Manicotti